I've made quite a few amigurumi creatures recently, but only one that was a doll. The pattern was cute but I was less than pleased with the outcome, mostly because of the yarn colors I ended up using. I was anxious to get started and used some beige yarn I had on hand. That made the skin color too dark for the yellow hair I chose, giving her an odd, over-tanned look. Experience is such a good teacher, isn't it? If I hadn't used half a skein of yarn, I'd cut her hair off and give her dark brown hair instead, but it doesn't look like that is going to happen.
Instead I decided to make a second doll. I analyzed what it was about doll #1 that didn't please me, and realized that I wanted one with more authentic little girl proportions. I was delighted when I found a free pattern for a
Crochet Bleuette doll.
I like the history of the design, even though this is a contemporary take on it. Still, how charming is it that the original Bleuette was made in France from 1905-1960? This new design in crochet is an excellent reinterpretation.
A doll's face is critically important, don't you think? I wanted little girl eyes, and after doing some Internet research I decided I wanted to keep them large, simple and colorful, but somewhat realistic looking. I embroidered both eyes before I realized they were too low!

After pouting for a while, I wrote that off to experience, turned the head around to the other side, and did another set of eyes, recalling from my drawing days that eyes are generally in the middle of the head, although kids' eyes are just a little lower than that. Then I carefully picked out the first set of eyes, knowing the area would be covered by hair.
The second go made me very happy, so the experience was worth it. Let's face it, I'm in that stage of development where if you paid me a minimum hourly wage, this doll would have to be priced at $500! I bet I've redone each one of her various anatomical parts three times over. Maybe four. Not to mention her eyes and hair.

Yeah, if experience is the best teacher, I'm on the steep part of the learning curve and about to fly off the track. But as I said to my husband, it's tedious but oddly satisfying to do. When my fingertips get sore, I take a day off.
I consider this an art, not a science. The fact that her eyes are each a tiny bit different works. I like the color and shape, and especially the light catches, made with three stitches of white floss, which makes them look a little more realistic.
Then I started on her hair. Boy, hair takes a lot of time! First I did a lot of Internet research, exploring a lot of information that's shared by this very generous community. After looking at wigs made of human hair, acrylic or mohair, I decided I needed to make something at home rather that buy one. I saw straight hair and curly hair; buns, pigtails, ponytails; yellow, brown, green, purple, brown, and black hair.
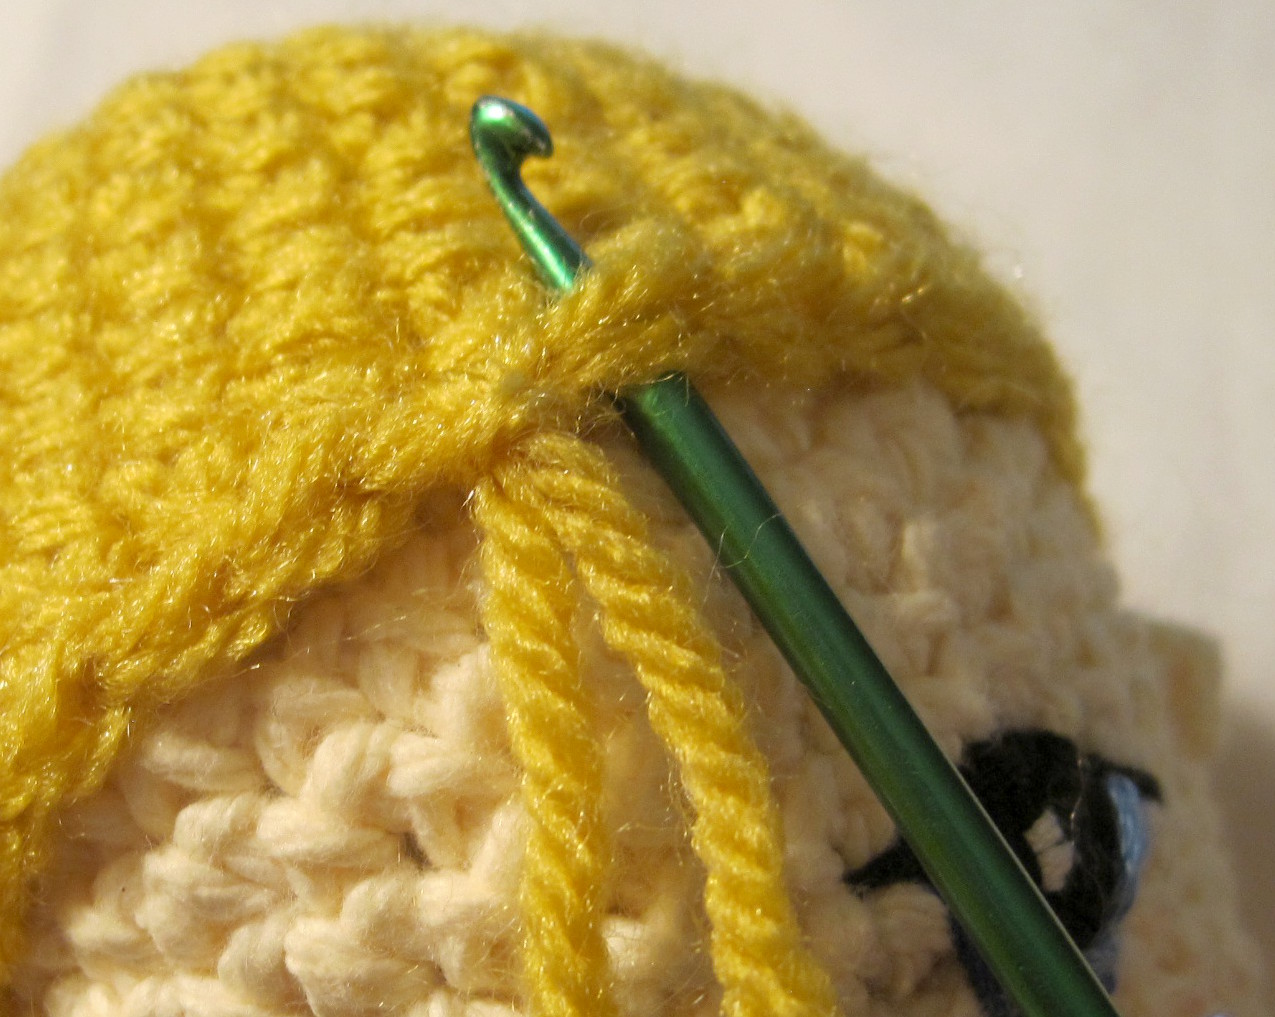
As you can see, in the end I chose black yarn, which I like with her fair skin color and blue eyes. I crocheted a wig cap, so her white scalp wouldn't show through. I used a larger hook and made the top part of the original head design for the wig cap. Then I split my 4-ply black yarn into two 2-ply strands and threaded them through to make this loose, fun, layered hairstyle.

I thought I might pull her hair back into a ponytail or pigtails, so when I designed the hair I made sure the locks went all the way around the outside edge. I began with the part in front, actually placing the bangs first. Then I made several rows down the sides of her head, angling some strands forward and some back, as you can see. Once the top half of her head was covered, I started rows from side to side all the way down the back. Oh, and I'd say they were placed two rows apart, not in every single crochet.
So this is the head complete with hair. I like the look, so far. Keep it simple, I kept reminding myself, and I think I did.
I'll add more steps as I go along. Stay tuned.




 After pouting for a while, I wrote that off to experience, turned the head around to the other side, and did another set of eyes, recalling from my drawing days that eyes are generally in the middle of the head, although kids' eyes are just a little lower than that. Then I carefully picked out the first set of eyes, knowing the area would be covered by hair.
 Yeah, if experience is the best teacher, I'm on the steep part of the learning curve and about to fly off the track. But as I said to my husband, it's tedious but oddly satisfying to do. When my fingertips get sore, I take a day off.
 I thought I might pull her hair back into a ponytail or pigtails, so when I designed the hair I made sure the locks went all the way around the outside edge. I began with the part in front, actually placing the bangs first. Then I made several rows down the sides of her head, angling some strands forward and some back, as you can see. Once the top half of her head was covered, I started rows from side to side all the way down the back. Oh, and I'd say they were placed two rows apart, not in every single crochet.


