 |
| Wig cap sewn in place on a Crochet Bleuette Doll. |
Sewing on the Wig Cap
The head is already fastened to the neck and now it's time to fit the wig cap. The cap is made with the hair color, in this case blonde (Vanna's Choice, Mustard color), using a hook one size larger than that used for the skin (Lily Cotton, Cream). The yarn I've used for hair is nice and stretchy, allowing me to mold the wig cap around the head.I had the eyebrows in place but when I started to fit the wig cap I realized they were making me feel like the hairline had to recede too far, so I decided to remove them until later. That way I could fit the hairline where it belongs and add eyebrows where they need to be. Yes, it's a little harder to embroider eyebrows when the neck cavity isn't open, as that's where my yarn entered and exited, but there are ways to do a simple little line like an eyebrow on a closed head.

As to the fit of the wig cap, it's a personal choice deciding how large you want it to be. I find that it usually looks oddly small when you hold it up, but it stretches out like a 1950s style swimming cap when you push it onto the head. So don't be alarmed if it looks way too small--unless it's made of cotton.

If you use cotton for it, be sure to carefully crochet the shape of the head in a slightly larger size. I suggest multiple and frequent fittings to be sure you're on track.
As a rule, I make the cap large enough to sit fairly close to the ears. With polyester yarn you can even shape the hairline a bit, tugging it down into place at the neckline behind the ears.

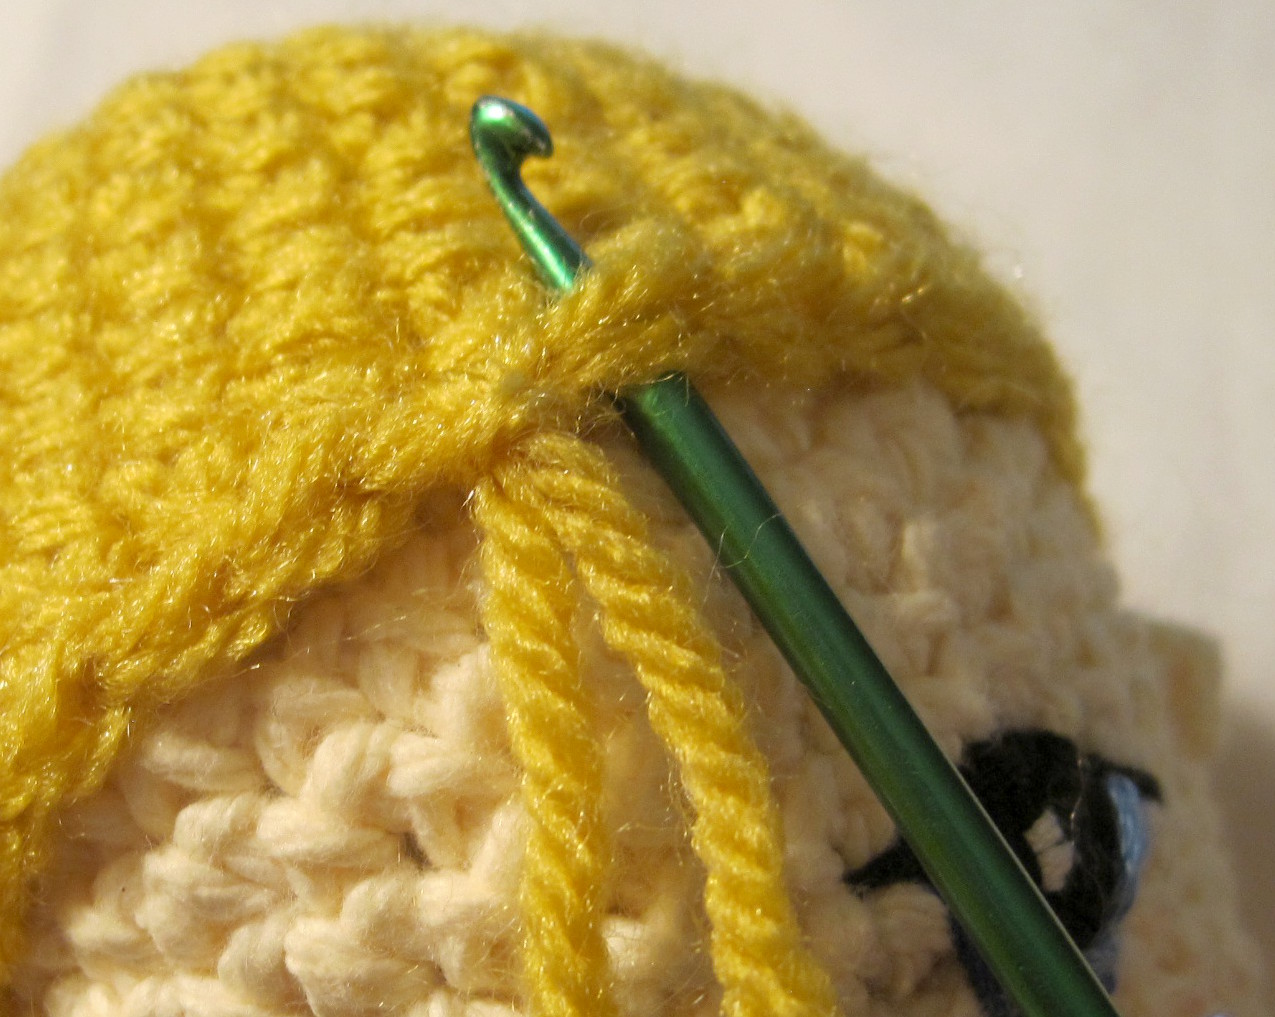
I simply stitch it in place with a blunt-nosed crochet needle, going around the edge of the cap with a strand of hair yarn cut one and a half head circumferences long. As you begin stitching, leave about a 2" tail. Be sure your stitches grab the scalp, and try not to stitch into the very edge of the cap, in order to leave the last row of crochet Vs free for attaching the hair.
|
| The wig cap stitched in place. |
Applying Hair
The hairline will look much more natural once the hair is attached around the edge. Most important to me is understanding which way the hair will lie on the head. This can determine how convincing the hair ends up looking.Different kinds of hair require different consideration, of course, but for this doll I'm making straight Caucasian hair. I'm keeping it very simple, not separating the yarn into strands, which gives a bit more texture to the hair.
I discovered that whichever way I PULL the yarn through the wig cap is the direction it lies in place. For instance, for this doll I want bangs pulled forward over the face, The locks need to come down over the forehead, while those behind the bangs will lie flat to either side.
I figure out where the lock of hair needs to be, then poke my hook under it and check to make sure that the direction I will PULL is the way it should go.
 |
| The direction you PULL the yarn determines the hair's direction. |
 |
| The two tails of yarn will be pulled through the loop. |
 |
| The loops lock the tails in place, holding them down. |

Here you see the first row along the hairline, creating the bangs.
To be continued...
I like it very muche. Stuffing under cap it's very good idea! Thx:)
ReplyDelete